The purpose of this blog post is to explain how Secure Boot works. In particular, we will explain where current implementations of Secure Boot by Linux distributors fall short compared to Microsoft Windows and Apple macOS.
Major distributors like Canonical, Debian, openSUSE, and Red Hat place a high priority on making their operating systems work out of the box. Given the current Linux landscape with out-of-tree drivers and incompatible licenses, providing the end user with all the drivers possibly needed to boot the system can be challenging.
In this post we will describe how to set up Secure Boot on Gentoo Linux. Gentoo Linux is sometimes described as a meta-distribution. It leaves many decisions up to its users—and with that, a fair amount of work. The upside is that users can decide exactly how to set up the boot chain without having to work “against” the distributor. For this reason, we chose Gentoo Linux to demonstrate the different ways to set up Secure Boot.
On a hardened system, Secure Boot should be deployed along with full disk encryption1.
Secure Boot
Secure Boot enforces a hierarchy of keys and hashes with the goal of verifying and loading EFI executables. In the simplest case, this executable is the bootloader. Before execution its signature or hash value are checked against the deployed values.
Good resources for reading up on UEFI Secure Boot can be found in the UEFI Specification2, Oracle’s explanation of UEFI Secure Boot3, James Bottomley’s blog post on “The Meaning of all the UEFI Keys”4 or @depletionsmode’s blog post about “Understanding modern UEFI-based platform boot”5.
Unlike most other guides, we’ll explain this hierarchy from the bottom up.
- Signature Database (db): The signature database contains public keys, digital signatures, or hashes of executables. When an EFI binary is loaded, it is checked against the entries in
dband allowed to execute if a match is found. - Forbidden Signature Database (dbx): The
dbxworks similarly to the signature database but serves the opposite purpose. It contains public keys, signatures, or hashes that are explicitly disallowed. If an executable matches an entry in thedbx, execution is blocked, even if it would otherwise be valid. - Key Exchange Key (KEK): KEKs are used to sign and authorize updates to the
dbanddbx. Multiple KEKs may be present, allowing different entities (e.g., Microsoft or the platform vendor) to manage the signature databases. - Platform Key (PK): The Platform Key is the root of trust. It belongs to the platform owner (i.e., typically the vendor), but it can be replaced with a custom PK generated per device, user, or organization. The PK is used to sign KEKs and to authorize its own replacement.
Note that there is only one Platform Key at a time, but there may be multiple KEKs and database entries.
Ultimately, it is the db and dbx databases that decide whether a binary can be executed. These databases are signed, and therefore managed, by the KEKs. The platform owner, through the PK, controls which KEKs are trusted by signing them.
In a typical factory-default configuration (e.g., on a notebook), the PK is set by the vendor. There are usually two KEKs installed and signed by the vendor:
- A vendor KEK, used to sign databases containing firmware updates or vendor-specific recovery entries.
- A Microsoft KEK, which allows Windows Update to manage Secure Boot databases.
The respective private keys are known only to their owners. Note that KEKs are not scoped: anyone with access to the corresponding private key can add arbitrary binaries (firmware, kernel, drivers, etc.) to the db, effectively granting them Secure Boot trust.
Shim Loaders and Machine Owner Keys
Major distributions aim to ensure that their systems work out of the box. However, they do not have their own keys pre-installed in UEFI firmware, nor do they possess the private keys of the platform vendor or Microsoft. To bridge this gap, a shim loader is used.
shim is signed by Microsoft and embeds the distribution’s public key. During the boot process, shim is loaded by the UEFI firmware and uses its built-in key to verify subsequent stages of the boot process.
First, shim verifies and loads GRUB. GRUB then allows the user to select a boot entry. GRUB uses shim’s validation infrastructure to verify the kernel image before loading it. If verification is successful, control is transferred to the selected entry, which typically is the Linux kernel. Once running, the kernel is responsible for verifying kernel modules as they are loaded.
Linux faces challenges with third-party and out-of-tree kernel modules (i.e., drivers). These modules may not ship with the distribution and are often built on the host system using DKMS when a kernel update occurs. However, because the distribution’s private key is not present on the host, these modules cannot be signed with a trusted key already known to shim or the kernel.
To solve this, Machine Owner Keys (MOKs) are used. These keys are generated on the host system and enrolled into UEFI NVRAM on the next reboot.
MOKs are not part of the official UEFI Secure Boot specification but are recognized by shim and the Linux kernel. When a third-party or out-of-tree kernel module is rebuilt, it can be signed with the MOK, allowing it to load without violating Secure Boot policies.
Initial RAM Filesystem and Unified Kernel Images
The boot chain described above verifies the kernel and its modules. However, userspace components like the initial RAM filesystem (initramfs) are typically not verified. The initramfs is a minimal root filesystem containing the userspace utilities needed to mount the real root filesystem and transfer control to the init system.
Unified Kernel Images (UKIs) bundle the kernel, initramfs, command-line parameters, CPU microcode, and more into a single monolithic EFI binary that can be signed. UKIs are built as PE (Portable Executable) EFI binaries, the same format used by standard UEFI applications, which allows them to be directly verified and executed by UEFI firmware or shim. This allows the entire early boot chain to be cryptographically verified.
A UKI can, in principle, be directly loaded and verified by UEFI itself, without involving a bootloader. However, this requires the user to sign the UKI with a key enrolled in db, and thus also to manage their own KEK and PK. While this provides full control, it’s a complex process and, if done incorrectly, may render the device unbootable.
Alternatively, the UKI can be loaded by a bootloader and one can take advantage of shim, which supports verifying binaries signed with Machine Owner Keys (MOKs). This raises the question: can shim directly load a UKI?
In theory, yes. shim can verify and launch any signed EFI binary, including a UKI. In practice, however, shim is hardcoded to load GRUB as its next stage. Customizing this behavior requires modifying shim, which is not permitted unless you control your own Secure Boot keys (PK, KEK, db).
Therefore, in most cases, the chain remains: UEFI → shim → Boot Loader → UKI
Setup on Gentoo Linux
We intend to set up the boot chain so that modification of the Secure Boot keys is not required, and only importing a Machine Owner Key is necessary. When GRUB verifies a UKI, it does not rely on the MOK and instead checks against the Secure Boot keys. There exist patches by Red Hat and Canonical for their respective distributions, but they have not yet been upstreamed. Therefore, we will use systemd-boot. When systemd-boot loads the UKI, the systemd-stub inside the UKI reuses shim’s verification logic, so a UKI signed with your MOK is accepted without touching PK/KEK/db.
Gentoo Linux uses Fedora’s shim, which is signed by Microsoft and hardcoded to run grubx64.efi that is located in the same directory as the shim loader. Thus, a “minor hack” is necessary to run systemd-boot: the systemd-bootx64.efi binary will be renamed to grubx64.efi.
We assume the reader has a FAT32-formatted EFI System Partition (ESP) mounted on /efi and no separate /boot partition. Also, we use the gentoo-kernel-bin package. We will be using dracut for initramfs generation.
This guide was created on a Gentoo Linux system with the OpenRC init system. For users with the systemd init system, the only change should be to replace the package systemd-utils with systemd in the config below.
Gabriele Svelto did a similar tutorial in his blog post6. He uses GRUB instead of systemd-boot, and regular kernel images with unsigned initramfs instead of UKIs. This has several disadvantages:
- The
initramfsand the kernel command line are not signed. - GRUB cannot boot UKIs signed with MOKs.
- GRUB needs to have all its modules signed, or a monolithic “standalone” build must be used and updated for each new kernel.
Nonetheless, credit where credit is due: this blog post was inspired by his.
Generating and Installing the Machine Owner Key
First, we will generate the Machine Owner Key into /root/secureboot and also convert it to DER format, which is necessary when importing into NVRAM:
root ~ # openssl req -new -nodes -utf8 -sha256 -x509 -outform PEM -out /root/secureboot/MOK.pem -keyout /root/secureboot/MOK.key -subj "/CN=<your name here>/"
root ~ # openssl x509 -in /root/secureboot/MOK.pem -outform DER -out /root/secureboot/MOK.der
With the MOK created, we need to set the correct USE flags and variables in /etc/portage/make.conf. Ensure that modules-sign and secureboot USE flags are set:
USE="... modules-sign secureboot ..."Also ensure that the variables for the certificate and key are correctly set in /etc/portage/make.conf:
SECUREBOOT_SIGN_KEY="/root/secureboot/MOK.key"
SECUREBOOT_SIGN_CERT="/root/secureboot/MOK.pem"
MODULES_SIGN_KEY="/root/secureboot/MOK.key"
MODULES_SIGN_CERT="/root/secureboot/MOK.pem"
Note that you could use a separate key for the modules. We skip this for simplicity.
We will be using dracut to generate our initramfs and UKI. We need to tell dracut about our MOK so that the UKI can be automatically signed. Put the following into /etc/dracut.conf or /etc/dracut.conf.d/secureboot.conf:
uefi_secureboot_cert="/root/secureboot/MOK.pem"
uefi_secureboot_key="/root/secureboot/MOK.key"
If mokutil is not already installed, install it with emerge mokutil. Finally, import the keys into NVRAM:
root ~ # mokutil --ignore-keyring --import /root/secureboot/MOK.der
root ~ # mokutil --ignore-keyring --import /usr/src/linux-<version>-gentoo-dist/certs/signing_key.x509
You will need to set a password which you will be asked to enter on the next reboot to deploy the keys. The password is only used once for the deployment of the keys and can be discarded afterwards. The procedure is described below.
Installing systemd-boot and Generating the UKI
We have set up the keys so far. Next, we need to install systemd-boot and ensure that UKIs are automatically generated and signed. First, set the corresponding USE flags for sys-apps/systemd-utils and sys-kernel/installkernel in /etc/portage/package.use:
sys-apps/systemd-utils boot kernel-install secureboot
sys-kernel/installkernel dracut systemd systemd-boot uki
Now, install the packages normally:
root ~ # emerge systemd-utils shim installkernelNext, install systemd-boot and shim to the EFI System Partition. Note that we need to rename (or copy) systemd-bootx64.efi to grubx64.efi as loading grubx64.efi is hardcoded into shim. Also, FAT32 does not support symlinks.
root ~ # bootctl install --no-variables
root ~ # cp /usr/share/shim/BOOTX64.EFI /efi/EFI/systemd/shimx64.efi
root ~ # cp /usr/share/shim/mmx64.efi /efi/EFI/systemd/mmx64.efi
root ~ # cp /efi/EFI/systemd/systemd-bootx64.efi /efi/EFI/systemd/grubx64.efi
Finally, create the boot entry with efibootmgr:
root ~ # efibootmgr --disk /dev/vda --part 1 --create --label "Systemd-boot via Shim" --loader '\EFI\systemd\shimx64.efi'Assuming that sys-kernel/gentoo-kernel-bin is used, reconfigure (or reinstall) it so that installkernel will be triggered and the UKI will be generated.
root ~ # emerge --config gentoo-kernel-binIf you have external kernel modules installed via Portage, you may have to rebuild and sign them. To find out which installed packages have the modules-sign USE flag, you can use equery from app-portage/gentoolkit:
root ~ # equery -q hasuse modules-signOn the next reboot, you will be asked to deploy the MOKs. Afterwards, you should be able to boot your system with Secure Boot enabled.
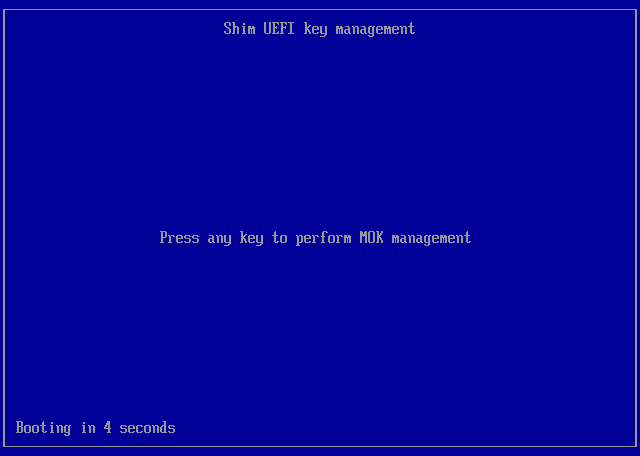
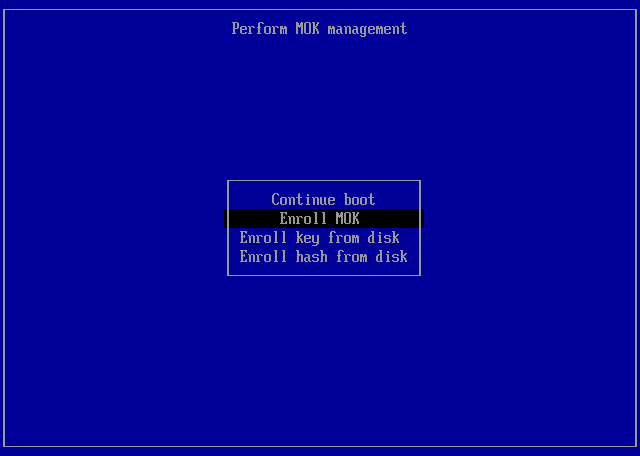
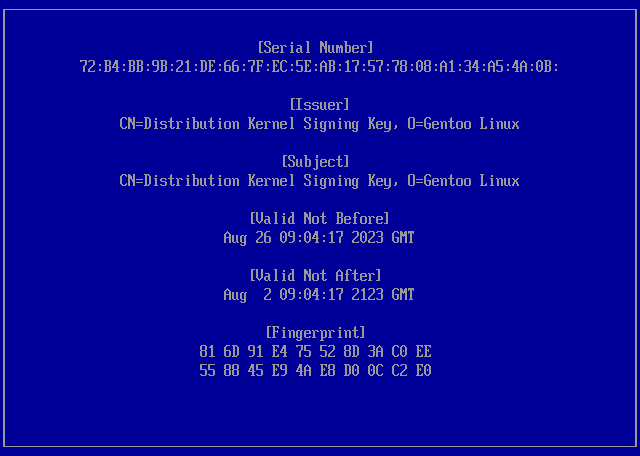
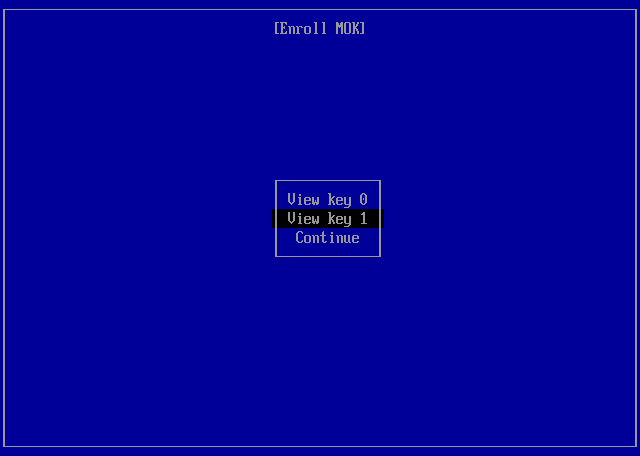
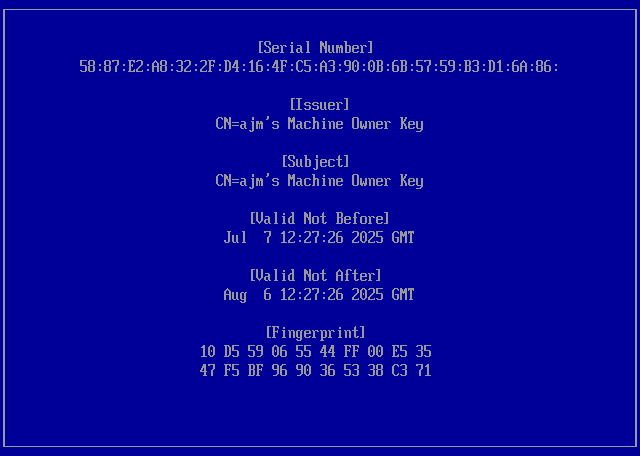


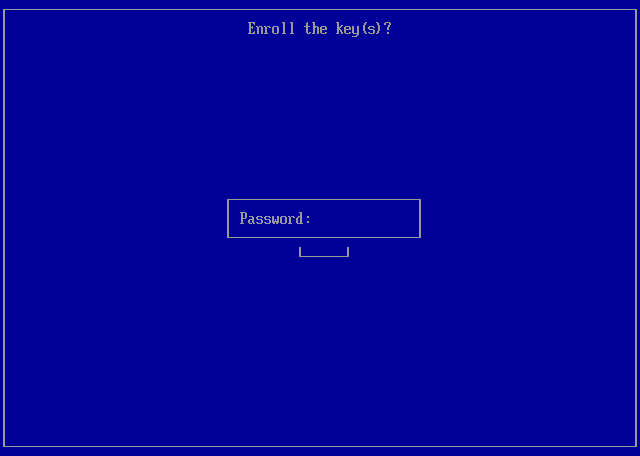

On the next reboot the MOK Manager is started and asks the user to enroll the Machine Owner Keys.
Hardening
In the default configuration, dracut drops to a debug shell if an error occurs7. Additionally, it is possible to edit the kernel command-line arguments from within systemd-boot. From there, an attacker could enroll their own MOK and modify the UKI. Therefore, it is advisable to add the options efi=noruntime and rd.shell=0 rd.emergency=halt to the kernel_cmdline variable in /etc/dracut.conf.
Be sure to also include any other parameters required to boot your system. These can be obtained by inspecting the current kernel command line, for example:
root ~ # cat /proc/cmdline
root=zfs:zsystem/ROOT/gentoo rootfstype=zfs rootflags=rw,noatime,xattr,posixacl,casesensitive
Then, set the kernel_cmdline variable in /etc/dracut.conf and append the additional parameters:
kernel_cmdline="root=zfs:zsystem/ROOT/gentoo rootfstype=zfs rootflags=rw,noatime,xattr,posixacl,casesensitive efi=noruntime rd.shell=0 rd.emergency=halt"When Secure Boot is enabled, systemd-boot cannot modify the kernel command-line parameters. If debugging is required, Secure Boot must be disabled first. Make sure a UEFI password is set to prevent unauthorized changes to Secure Boot settings.
Advanced Topics
A user may want to take full control of the system and deploy their own Secure Boot keys. This specifically requires replacing the Platform Key (PK). With the Platform Key under the user’s control, they can decide which Key Exchange Keys (KEKs) to deploy.
It is often recommended to include Microsoft’s KEK and db keys to avoid rendering the device unbootable. This is because Microsoft’s keys are frequently used to sign firmware. If the firmware cannot be verified due to missing keys, the system may become inoperable.
Enrolling Your Own Keys Using sbctl
A fully manual approach to enrolling Secure Boot keys is a cumbersome process. We refer the reader to the Secure Boot article in the Gentoo wiki8 for a complete manual guide. However, it is advisable to use sbctl. To do this, the system must first be put into Setup Mode. Setup Mode clears the existing Platform Key and allows new keys to be enrolled.
At the time of this writing, the version of sbctl in the Gentoo repositories is 0.16 and does not contain Microsoft’s 2023 certificates. These should be deployed as the old 2011 certificates expire in 20269. Version 0.17 of sbctl automatically deploys the current 2023 certificates10.
First, install sbctl as usual:
root ~ # emerge app-crypt/sbctlThen, only two steps are needed: creating keys and enrolling them. First create the keys:
root ~ # sbctl create-keys
Created Owner UUID a016ea31-f309-449a-9b64-6696af5bb218
Creating secure boot keys...✓
Secure boot keys created!
Then enroll them. It is recommended to use the -m command-line switch, which also deploys the Microsoft keys. Without these, the device may become bricked as Option ROMs are often signed with Microsoft keys and cannot be verified on the next reboot11.
root ~ # sbctl enroll-keys -m
Enrolling keys to EFI variables...
With vendor keys from microsoft...✓
Enrolled keys to the EFI variables!
You can find the keys in /var/lib/sbctl/keys/. The most relevant keys are the files in the db subfolder. These can be used in /etc/portage/make.conf with the SECUREBOOT_SIGN_* variables, and in /etc/dracut.conf with the uefi_secureboot_* variables.
Note that these keys cannot be used with the MODULES_SIGN_* variables in make.conf. The vanilla and Gentoo kernels do not verify modules against the platform keyring12. Debian13, Ubuntu14, openSUSE15, Fedora16, and Red Hat provide patched kernels that do verify modules against the platform keyring.
The gentoo-kernel-bin includes the Gentoo key so that modules shipped with the kernel are signed by Gentoo and can be verified. When packages with the modules-sign USE flag are used (typically zfs-kmod or nvidia-drivers), they need to be signed with a Machine Owner Key as described above. This also applies to the gentoo-kernel and vanilla-kernel packages, i.e., the non-binary kernels.
Advanced users who build their kernels manually can apply the patch to their kernel sources. Alternatively, it may be possible to build a monolithic kernel with module loading disabled. OpenZFS provides scripts17 to integrate the file system directly into the kernel.
Directly Booting the UKI
To directly boot a UKI, the image must be signed with a key present in the db. Note that verifying kernel modules requires them to be signed with a different key unless a patched kernel is used. A MOK cannot be used in this scenario because shim and the shim_lock verifier are not available. UKIs can be booted via shim, or the corresponding trusted certificate can be built directly into the kernel.
The process outlined above already creates signed kernel images in /efi/EFI/Linux. Using efibootmgr, these can simply be added as a boot option:
root ~ # efibootmgr --disk /dev/vda --part 1 --create --label "Gentoo Linux 6.15.4 (UKI)" --loader '\EFI\Linux\gentoo-6.15.4-gentoo-dist.efi'The efistub USE flag can be set on installkernel to automatically generate these entries. We refer the interested reader to the Gentoo guide18.
You ? consistently create content that builds better community and brings people together through shared experiences