Simple everyday work dialog:
“The heater in the basement is still missing a proper thermostat, the ‘binary
solution’ isn’t that effective”
– “Buy one…”
– “Ok”
– “Get one you can break…”
– “Ok, but then I’d like a few tools, too”
– “Go for it.”
(That’s the way work should be!)
Result of the dialog: a
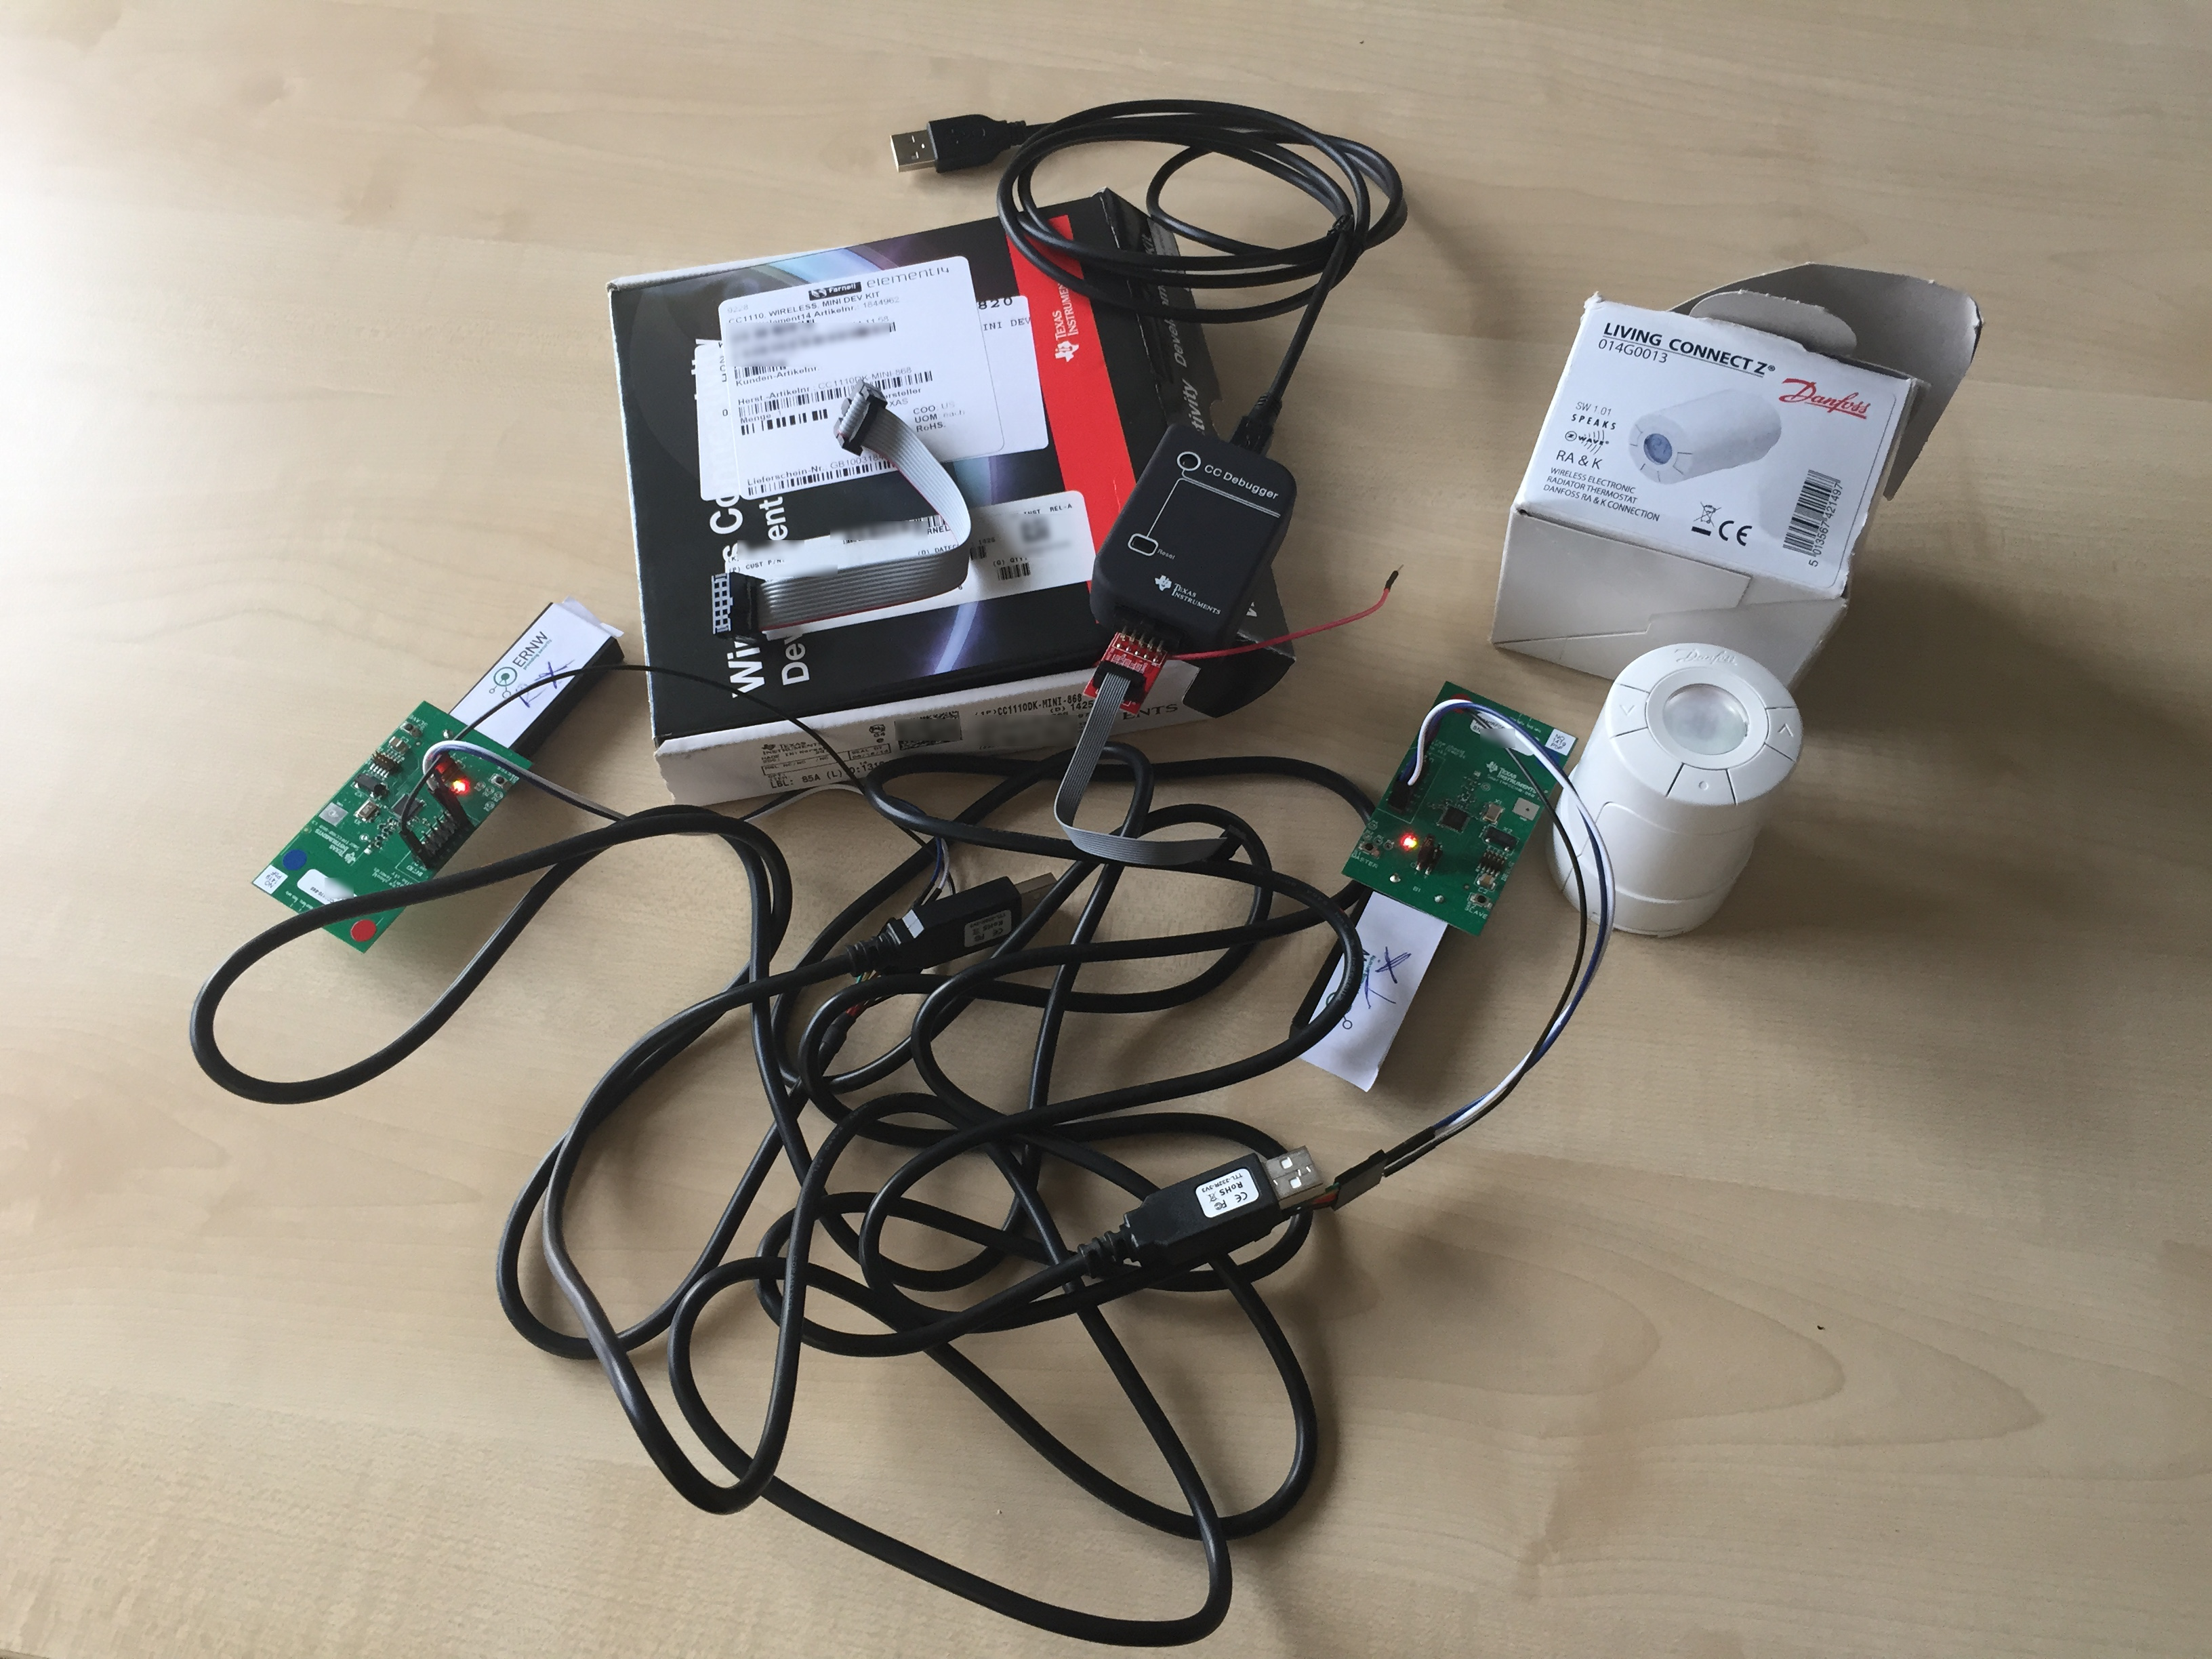
Danfoss Living Connect Z ( 014G0013 )
and a
TI CC1100 Wireless Mini Dev Kit plus
a copy of Z-Force to start with.
Goal: Talk to the thermostat!
Intro & related work
Z-Wave is wireless communication protocol
used for communication with various devices in the context of home automation
and remote control. Available devices include thermostats, movement sensors,
sirens and door locks.
The first talk I saw on the topic was at
44Con 2013, which was previously held at
Black Hat USA 2013.
Behrang Fouladi and Sahand Ghanoun presented their research results on different
security products using Z-Wave. Having a closer look at alarm systems and door
locks resulted in rendering the whole system broken. Although encryption is in
place, it’s possible (but ineffective due to timing constraints and the use of
low power transmissions) to simply record the key set message and extract the
key from there. Due to the used encryption, it is also possible and feasible to
calculate all necessary keys from captured packets. But there is still an even
easier approach: just connect to the lock and send your own key set message, and
it’ll be in your hands. If you like further detail, have a look at the recording
of their talk!
Equipment:
Hardware:
- Danfoss thermostat
- CC1110 Mini Dev Kit
- 2 RF modules
- 1 debugging/programming interface
- 2 sets of pin headers
- 2 USB <-> serial adapter cables (TTL-232R-3V3)
- Some jumperwires
Software:
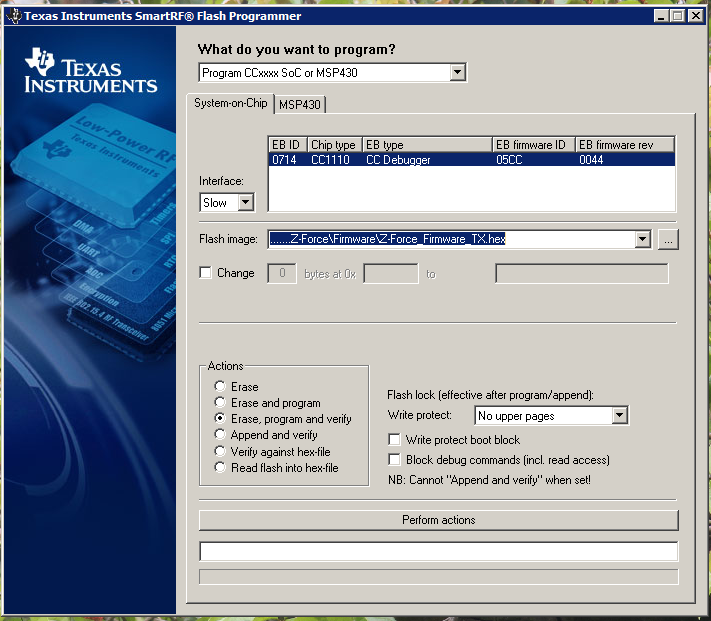
The first step was to solder pin headers onto the SmartRF CC1110 boards, to be able to actually use the serial header and communicate with the host device. In theory it would be enough to solder in the pins 1, 13 and 14 (GND, RX, TX). After grabbing the firmware images they need to be converted from the .bin format into .hex format by using srec_cat. “srec_cat.exe firmware.bin -binary -o firmware.hex –intel” will do the job. Then SmartRF FlashProgrammer and the CC Debugging adapter need to be used to program one RF module as a TX and the other one as the RX interface.
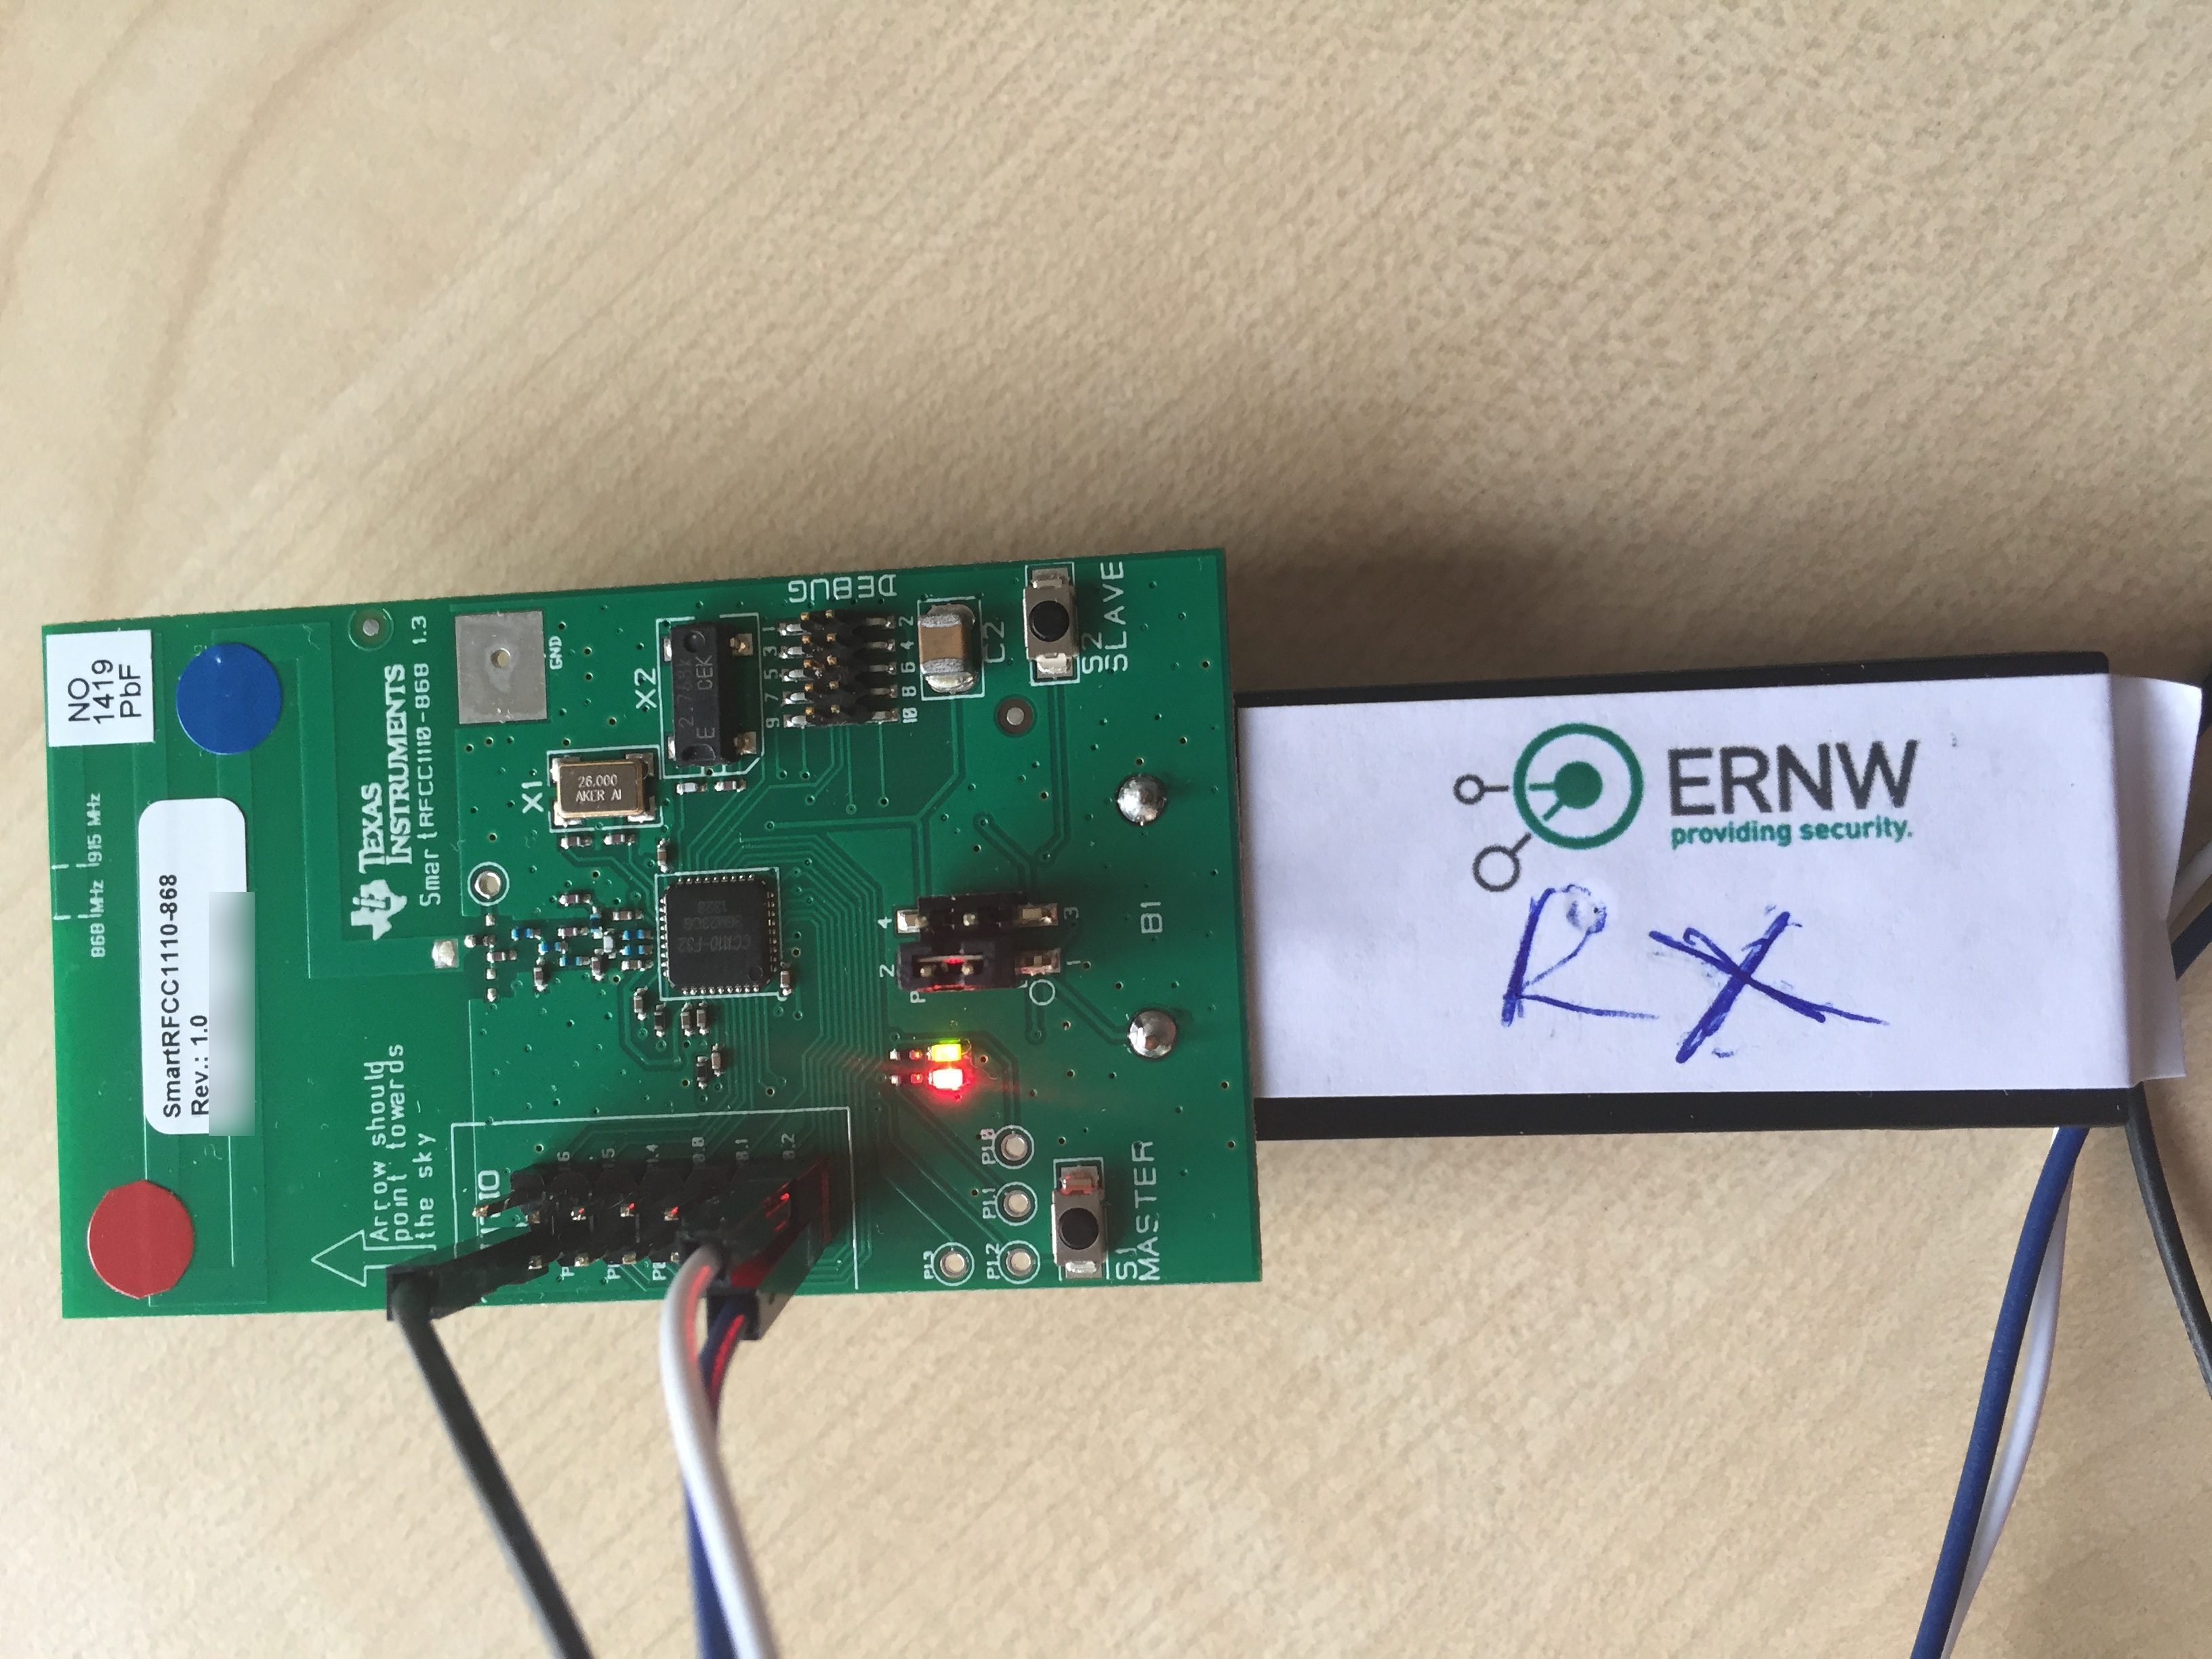
A quick note on supplying the RF modules with power: If you use the battery
compartment, the jumper on P1 needs to be placed on pin 1 and 2. More details on
the topic can be found in the
user guide.
The only thing left is to grab the serial adapter cables and hook both boards up
to the computer. Well, and start Z-Force and setup the correct serial ports!
The easiest test to verify the setup, is to actually start two instances of
Z-Force and use one to send and the other one to transmit a packet. As Z-Force
will not show the packets it has sent itself in the log, you do really need the
two instances.
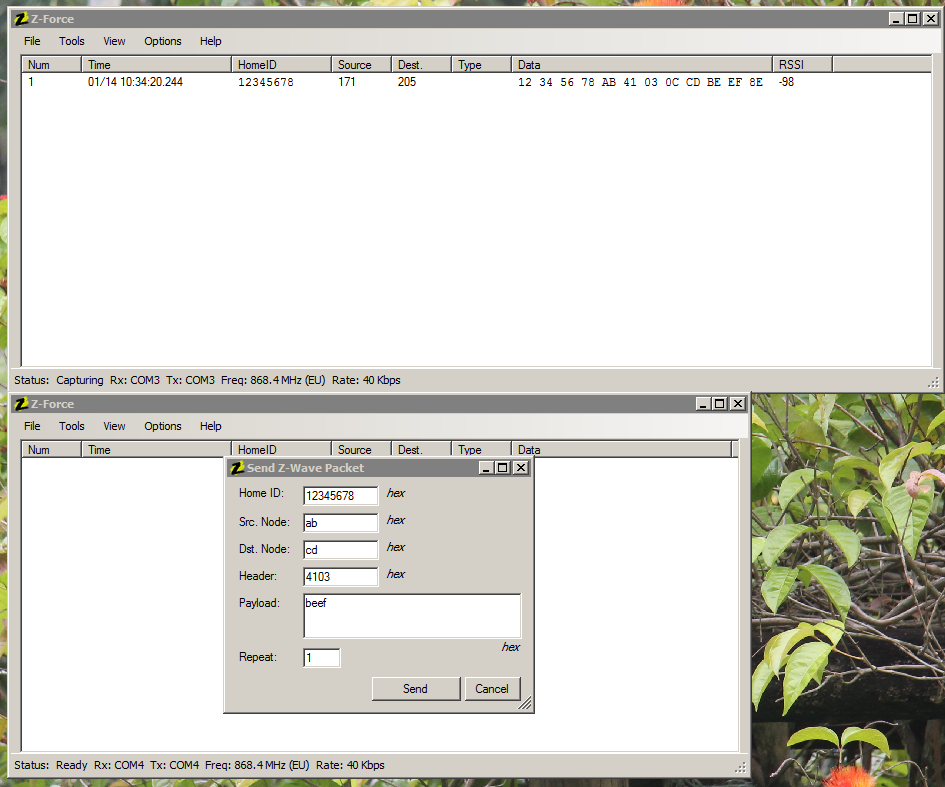
From now on sniffing and replay attacks become, well, feasible 😉
To actually get the first real world packet, I simply pressed the center button
on the thermostat, to make it send a broadcast message.

The whole packet is: F4 C6 C5 DE 00 45 01 2A FF 21 00 FA 40 00 00 00 00 00 00 00 00 01 01 53 9C 00 08 04 80 46 81 72 8F 75 43 86 84 EF 46 81 8F 36
The structure of the packet itself is rather simple:
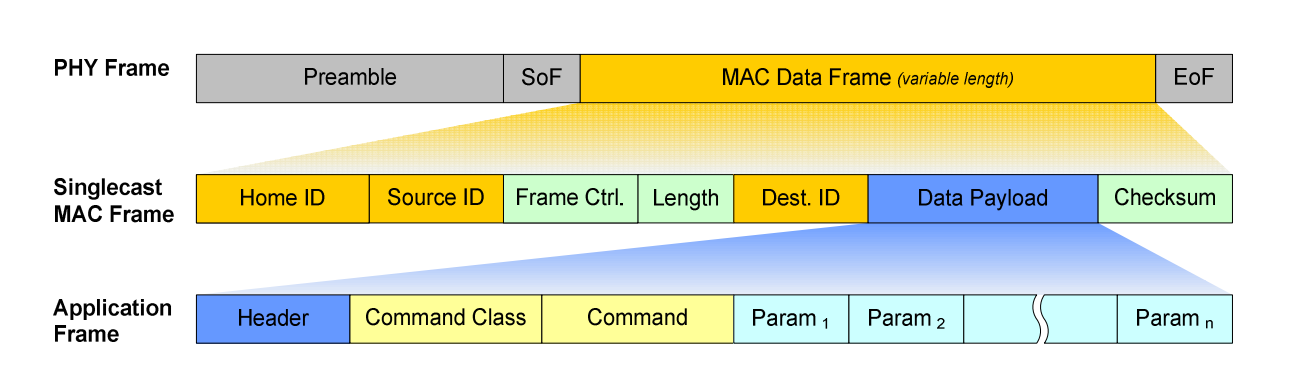
(Source:
https://github.com/yepher/RaZBerry )
12 34 56 78 AB 41 03 0C CD BE EF 8E breaks down into
Home ID 12345678
Source AB
Frame Ctrl 31 03
Length OC
Destination CD
Payload BEEF
Checksum 8E
The complicated part now is to actually break down the “Application Frame”, or payload, into its relevant parts which will be future work and hence be covered in a follow-up post.
Some more notes
For analyzing Z-Wave, attacks over the air are a real necessity: Instead of
having configuration and system information (like the Home ID) on the actual
host computer, the “interesting” stuff is stored ON the magic Z-Wave USB
adapter, which again comes with a custom chip in it. The stick contains the
actual database of keys and device addresses, so the host/control software is
basically only a GUI for the magic USB adapter.
Yet another fact
The hardware used for Z-Power is based on a
CC1100 which is the same chip as in the
IM-ME we already had a
closer look
at together with Michael Ossmann. Instead of
using a HackRF and taking the signals
apart manually, as it will be taught in his
TROOPERS
workshop,
the CC1100 on the RF module does the whole job. The chip is able to receive and
decode the signal and (with a bit of firmware) give us the received data in HEX
format.
Stay tuned for more episodes on Z-Wave & enjoy hardware hacking 😉
Brian